Skip to content
  • English
    • French
    • Italian
    • Spanish
    • German
    • Dutch
    • Portuguese (Portugal)
    • Greek
    • Polish
  • English
    • French
    • Italian
    • Spanish
    • German
    • Dutch
    • Portuguese (Portugal)
    • Greek
    • Polish
Logo Avidsen
  • Products
    • Products
    • Avidsen Brand
    • Extel Brand
    • Philips Brand
    • Thomson Brand
  • Support
    • Tutorials on repair and use
    • Avidsen Technical Support
    • Extel brand technical support
    • Philips technical support
    • Thomson Technical Support
  • The Group
    • The Group
    • Contact
  • Ethic Company
  • Where to buy ?
\

Wifi camera connection 127157 – Bluetooth method

  1. Home
  2. Wifi camera connection 127157 – Bluetooth method

Wifi camera connection 127157 – Bluetooth method

In this tutorial, we'll explain how to connect a 127157 camera via Bluetooth. For simplicity's sake, the procedure should be carried out close to your Internet box ( recommended ).

This tutorial is applicable for:

127157
Difficulté : Easy
Temps nécessaire : 5 minutes minutes
Nombre d’étapes : 5
Mise à jour : February 2025

Tutorial steps:

Step 1: Check camera connection status

  • Before connecting, check that the camera’s ON/OFF switch is in the ON position.
  • Make sure the camera’s red LED is flashing.
  • If the LED is not flashing red, hold the RESET button for 15 seconds until you hear “Your camera is power ON” and a beep.
  • The camera’s red LED should flash. You will then have 5 minutes to complete the connection.
  • If no action is performed during this time, the camera goes into standby mode to save battery power.

Step 2: Bluetooth recognition

  • Open the AvidsenHome application
  • Click on then on “Add a device”.

1

  • The camera appears at the top of the addition banner.

Sf the camera is not seen by the application, reset it. If the camera still doesn’t appear, go to your smartphone’s authorizations and check that “Nearby devices” or “Visible to other devices” is enabled.

  • Click on “Add

Step 3: Enter the WIFI key

  • Check for a network name (SSID) to the right of the symbol

If the network name doesn’t appear, go to your smartphone’s authorizations and check that the “Position” or “Location information” authorization is granted.

  • Enter your Internet box’s WIFI key.
  • Click on “Next

Step 3.1: Where to find the ORANGE operator Wifi key

  • LiveBox 4 = The wifi key is visible by clicking on the i on the front of your Livebox.
  • LiveBox 5 = The wifi key is located on the identification card and also on the label on the back of your Livebox.
  • LiveBox 6 = The wifi key is visible in the Wifi settings accessible from the front screen.

Step 3.2: Where to find the SFR operator Wifi key

  • SFR NB6/NB7/NB8 = The wifi key is located on the label on the back of your SFRBox.

Step 3.3: Where to find the Bouygues operator Wifi key

  • Bbox Miami/ 4K = The wifi key is located on the label on the back of your Bbox. It is the code written on the WPA line.


Step 3.4: Where to find the Freebox operator Wifi key

Valid for Freebox Delta/Pop/Révolution/mini/One/4G+/Crystal

  • Please download the “Freebox Connect” application available on the AppStore and Google Playstore.
  • Select your Freebox model and log in.
  • The wifi key for your Freebox is located in the “My Wifi Access” menu.

Step 4: Connecting the camera

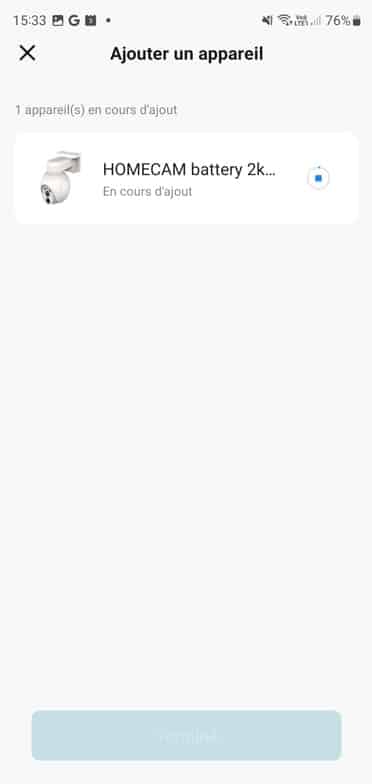
  • Wait for the camera to come online.

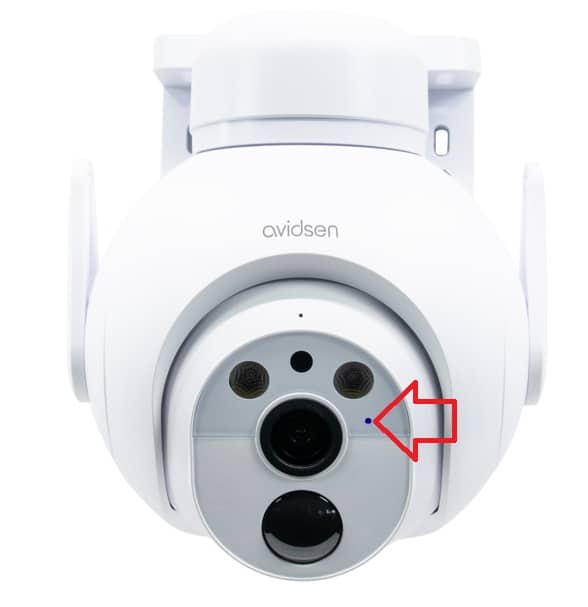
If the camera has received information, it will beep 1 times and the camera LED will flash blue.

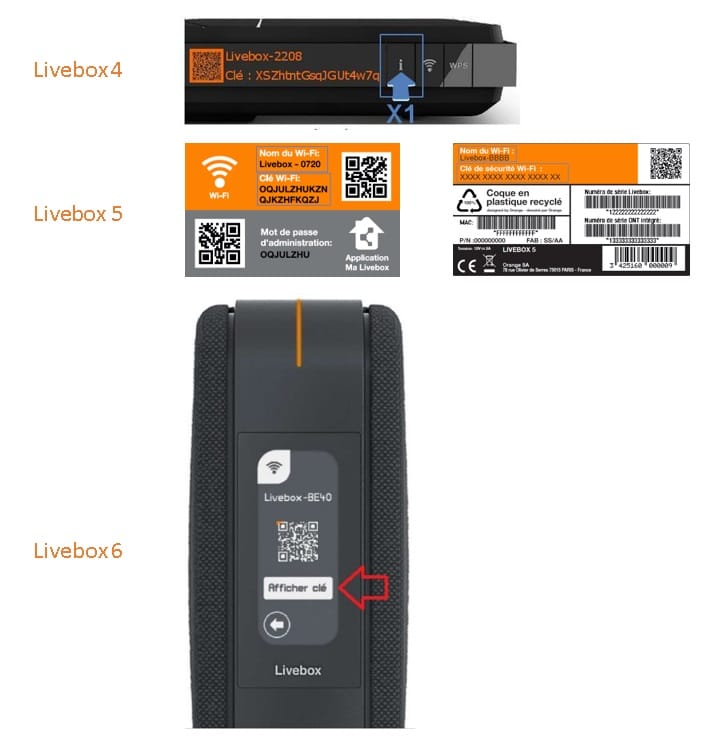
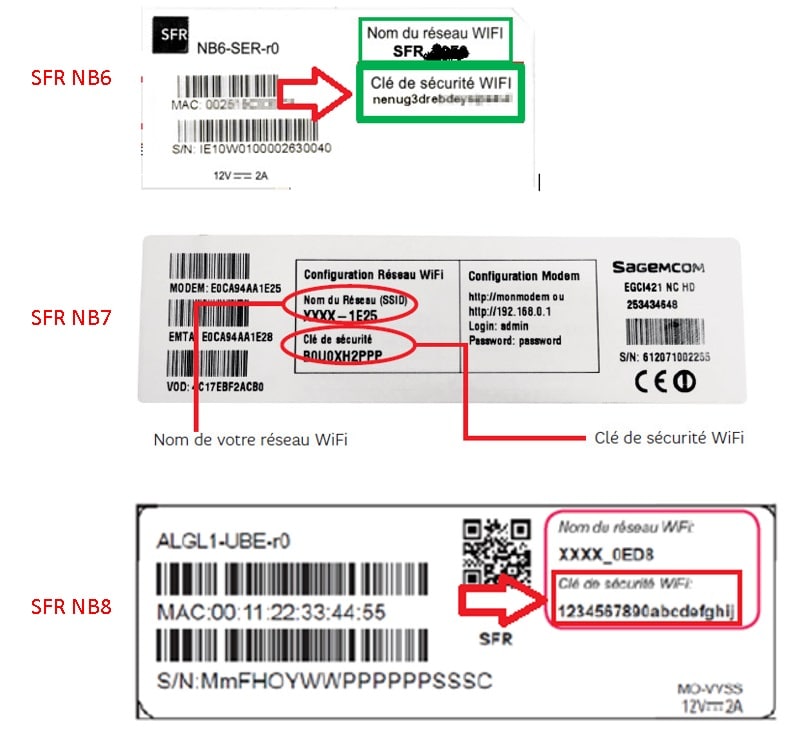
If the wifi key is entered incorrectly or wifi is incompatible, the camera will indicate “please check tour Wifi Password” and reboot. The LED will flash red.

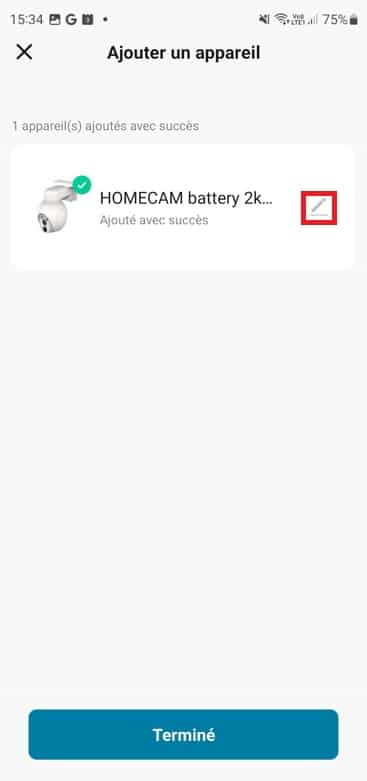
In the event of valid information, the blue LED will be steady and the camera will indicate “Your camera is connected to the Wifi”.
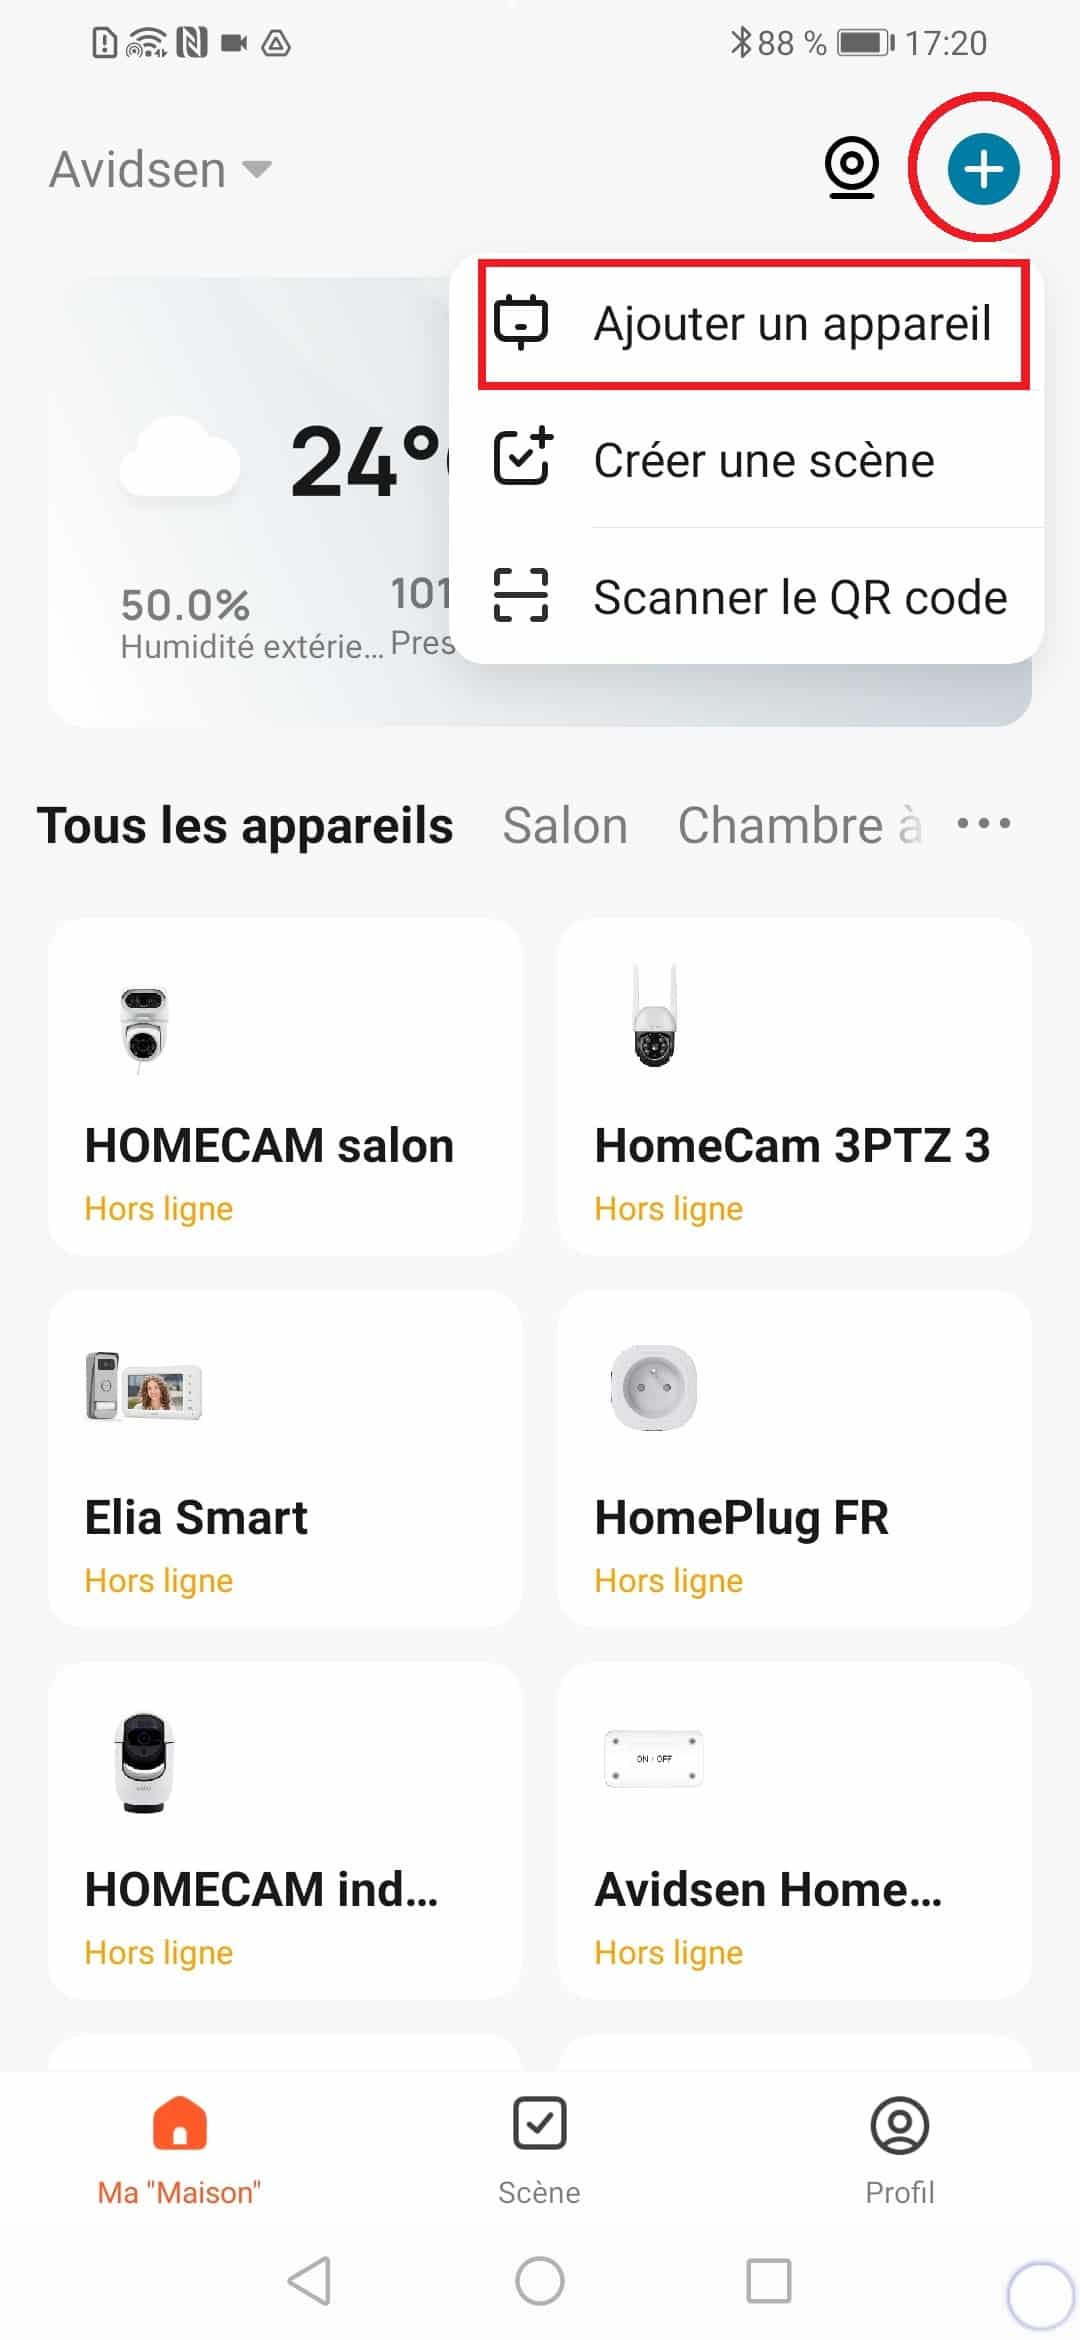
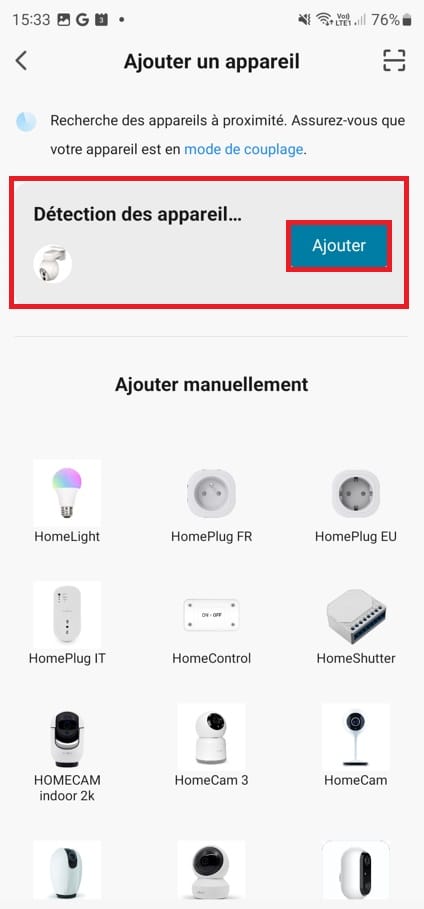
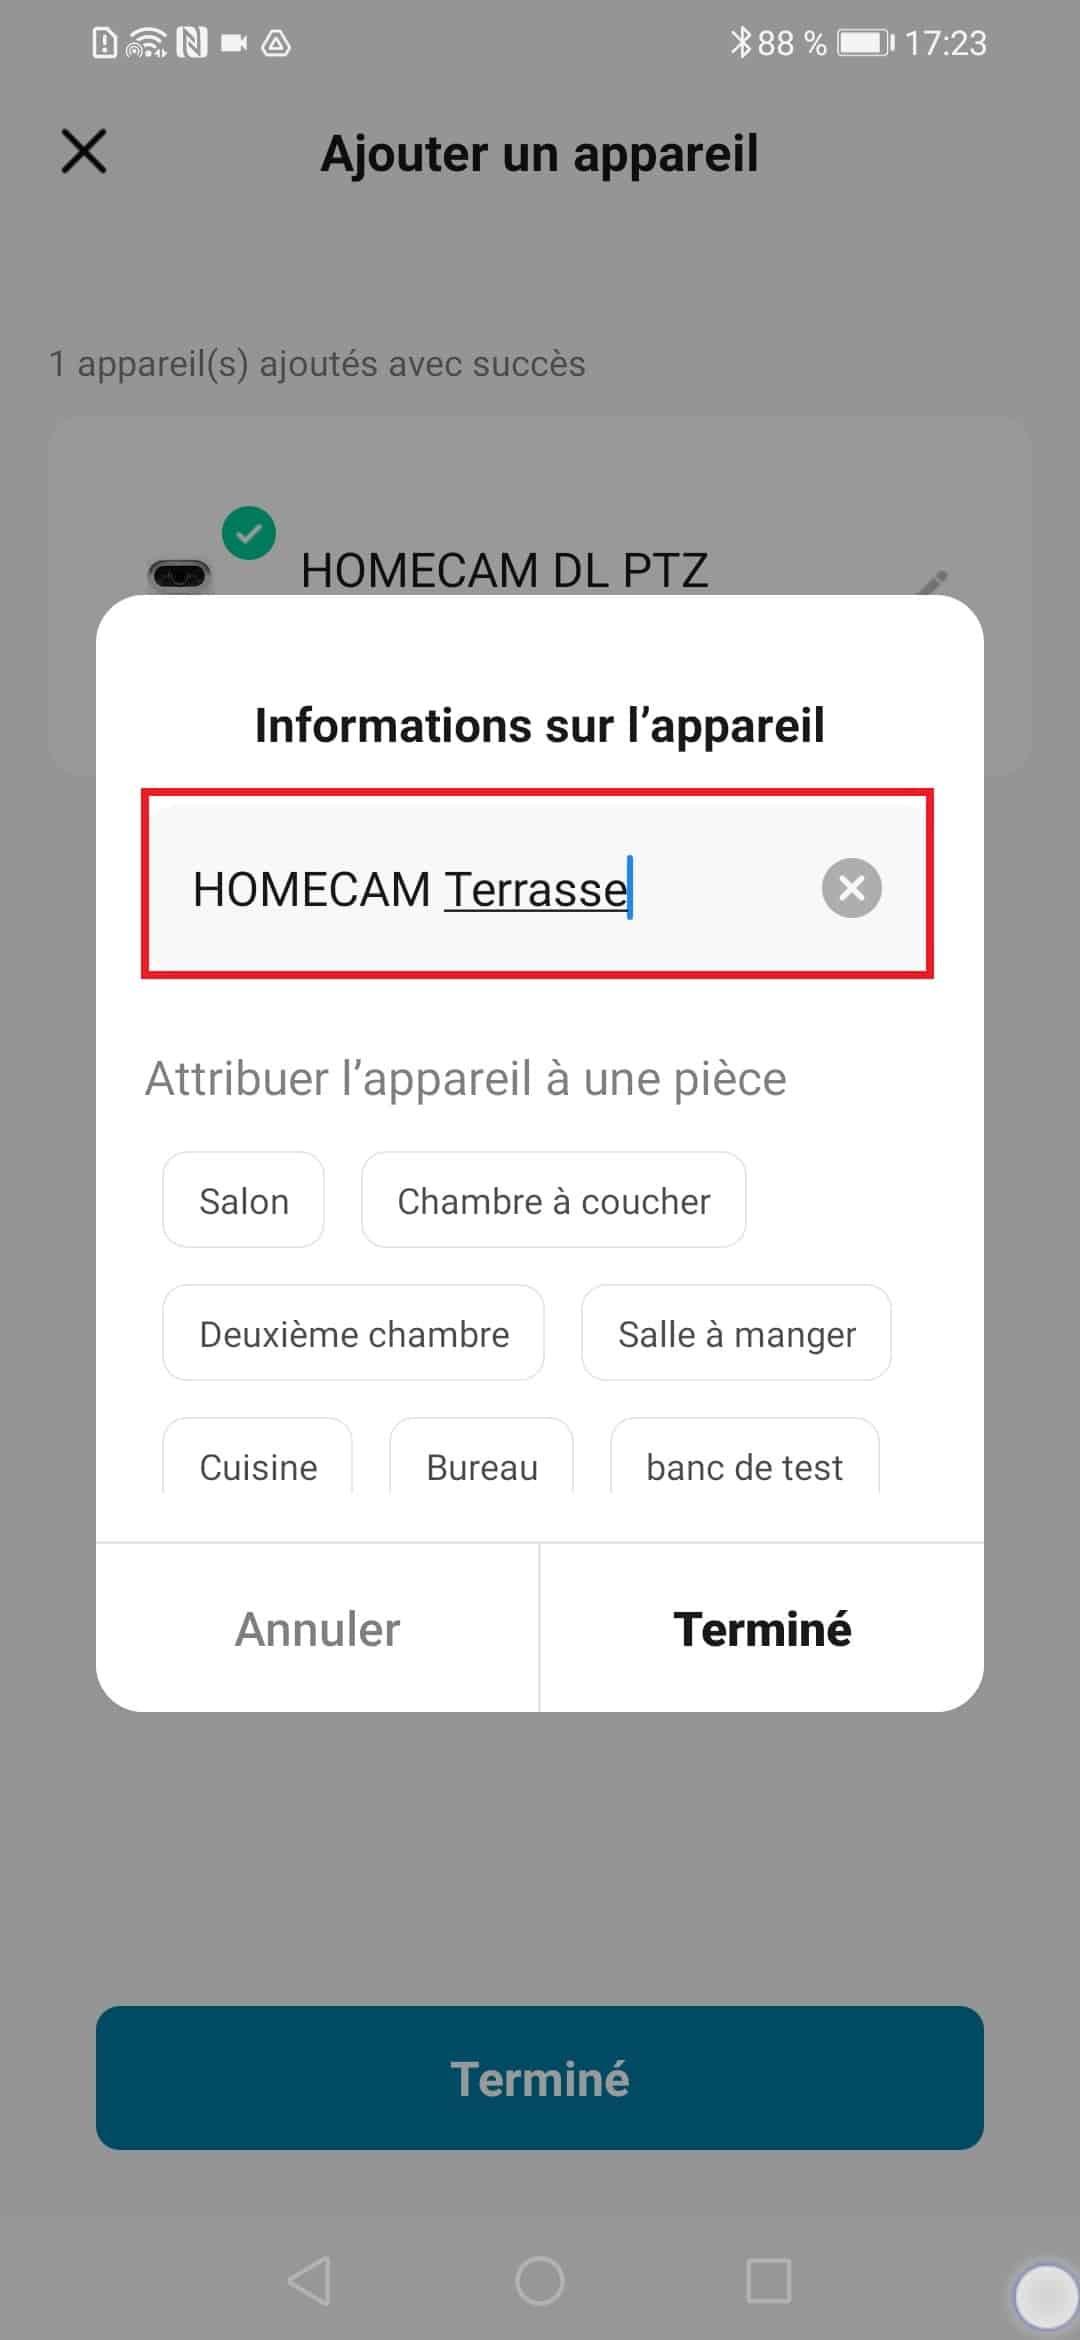
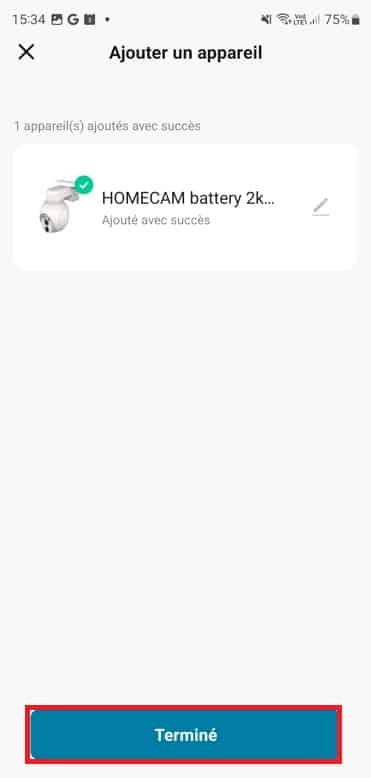
Step 5: Adding the camera

  • Once the camera is connected, this page appears on the application.
  • If you wish to rename the camera, click on the symbol
  • If you do not wish to rename the camera, click on “Done”.
  • Rename the camera with the desired name.
  • Click on Done to finalize the camera’s upload to the application.
Keep in touch
Youtube Linkedin

Follow us on social networks

About Avidsen
  • Who are we?
  • Contact
  • Who are we?
  • Contact
Support
  • Avidsen Technical Support
  • Extel brand technical support
  • Philips technical support
  • Thomson Technical Support
  • Avidsen Technical Support
  • Extel brand technical support
  • Philips technical support
  • Thomson Technical Support
Avidsen group brand
  • Avidsen Brand
  • Extel Brand
  • Philips Brand
  • Thomson Brand
  • Avidsen Brand
  • Extel Brand
  • Philips Brand
  • Thomson Brand
Copyright 2025 © All rights reserved Avidsen
  • Legal Notice
  • Personal data protection policy
  • Terms and Conditions of Use
  • Legal Notice
  • Personal data protection policy
  • Terms and Conditions of Use
Thank you for your rating!
Thank you for your rating and comment!
This page was translated from: French
Please rate this translation:
Your rating:
Change
Please give some examples of errors and how would you improve them: