Find out in this tutorial how to manage timed automatic closing
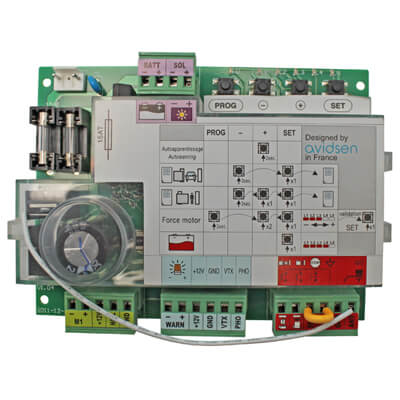
In order to use the automatic closing MODE, you must have connected photocells to the electronic board.
Press the “PROG” button on the board for 3 seconds (L1 lights up).
Press “+” 3 times (L4 lights up).
Press “SET” once (L1 is lit by default).
Press “+” once (L1 and L2 light up).
Press “SET” once (all LEDs light up then go out).
If L1 remains lit after the red LEDs are animated, automatic closing has failed.
Check photocells for correct connection.
By default, the card waits 30s before automatically initiating closing.
If you wish to modify the wait time, please refer to the tutorial “Setting the time delay”.